Blueberry crumble pie

Measuring the crust

The second pie of the day was a blueberry crumble pie…though actually this one was the first pie in and out of the oven. We got to smell it (and perhaps drool a little bit) while we were hard at work on all of the other pies. It was certainly worth the wait!

A key step in this crust is to roll it out between two sheets of wax paper.

I think the crumble idea would be great for an apple pie too!

Blueberry crumble pie
Serves: 8

Beautiful crimping!

Source: Kelly’s mom

Ingredients
For the crust:
1 3/4 cup flour
1/2 teaspoon salt
1/2 cup Wesson oil
3 Tablespoons cold water

For the filling:
5 cups blueberries
1 1/4 cup sugar to taste
3-4 heaping Tablespoons flour
Cinnamon

Blueberry filling


For the topping: 
3/4 cup flour
1/3 cup sugar
6 Tablespoons salted butter
Leftover pie crust
Cinnamon

Directions
1. Preheat oven to 400 degrees F.

2. For the crust: in a medium bowl, mix together flour and salt. Add oil and water and roll out between two sheets of wax paper. Place crust in pie pan, trim excess crust with kitchen shears, and crimp the edges. Save extra pie crust for the topping.

Ready to eat


3. For the filling: in a large bowl, mix together blueberries, sugar, and flour. Sprinkle with cinnamon. Place in unbaked pie shell.

4. For the topping: in a medium bowl, mix together flour and sugar, then cut in butter and leftover pie crust. Sprinkle with cinnamon and spread on top of blueberry mixture.

5. Wrap aluminum foil around the crust and bake at 400 degrees F for 30 minutes. Remove foil and reduce heat to 350 degrees F and bake for an additional 20 minutes or until bubbly. Allow to cool before serving.

Apple pie

With a little (ok, a lot) of help from some friends, and a fun “pie day”, I think I’ve conquered my fear of making pie crust. It was more a fear of the unknown, and those types of fears are usually bigger in your head than reality…and happily that turned out to be the case for pie crust. I’m not a huge pie-for-dessert person anyway, so learning to make pie hasn’t ever been too high on my “bucket list.” Pie day also means lots of pie recipes to share with you over the next few weeks, which is perfect since Thanksgiving is just around the corner!

There were many variations of pie crust recipes, mostly varying by the type of fat used (Crisco, vegetable oil, or butter). I decided to put myself on Team Butter and turned to a recipe from the trusty Everyday Food magazine.

Here are a few tips from my experience:

  • Make the dough first since it needs to be refrigerated for an hour (we didn’t do this)
  • I used a pastry blender instead of a food processor and that worked just fine.
  • I did need the full 1/2 cup of water for the dough.
  • You can prep the apples while the pie dough is being refrigerated. They will not turn brown once you mix in the lemon juice, flour, sugar, and spices (they will also taste delicious like that).
  • Make sure you put enough flour on the wax paper before you roll out the dough.
  • Baking it on a cookie sheets is important, our pie runneth over.
  • We put aluminum foil along the edges of the crust  just before we turned the oven down from 450 degrees to 375 degrees.
  • Apple pie takes a long time to cook, and cool!
And here are “tips for making the perfect apple pie” that my mom sent me, from Great South Bay magazine (October 2014)
  1. For the flakiest, most tender crust it is essential that you keep all of your ingredients and equipment cold as you work. Make sure that your butter stays in the fridge until you are ready to use it. Keep your water ice cold. Chill your flour if your kitchen is particularly warm, and if necessary, place everything in the freezer in between steps to chill them down.
  2. Use all butter in the crust. Shortening and lard are flavorless.
  3. Choose tart apples! The tarter the apple, the more pectin it contains, preventing the apple from breaking down and oxidizing. The apple slices will retain their shape and structure. Good choices are: Granny Smith, Royal Gala, Empire, Cortland, and Golden Delicious.
  4. Par-cook your apples. They will hold their shape better and will get rid of the air pocket that can occur between the top of the apples and the crust than when you add your apples raw.
  5. Let the pie cool. Fight the urge to cut into that hot, out of the oven pie and serve at room temperature. It will be perfectly glazed and juicy and the crust will have a flakier, crispier texture.

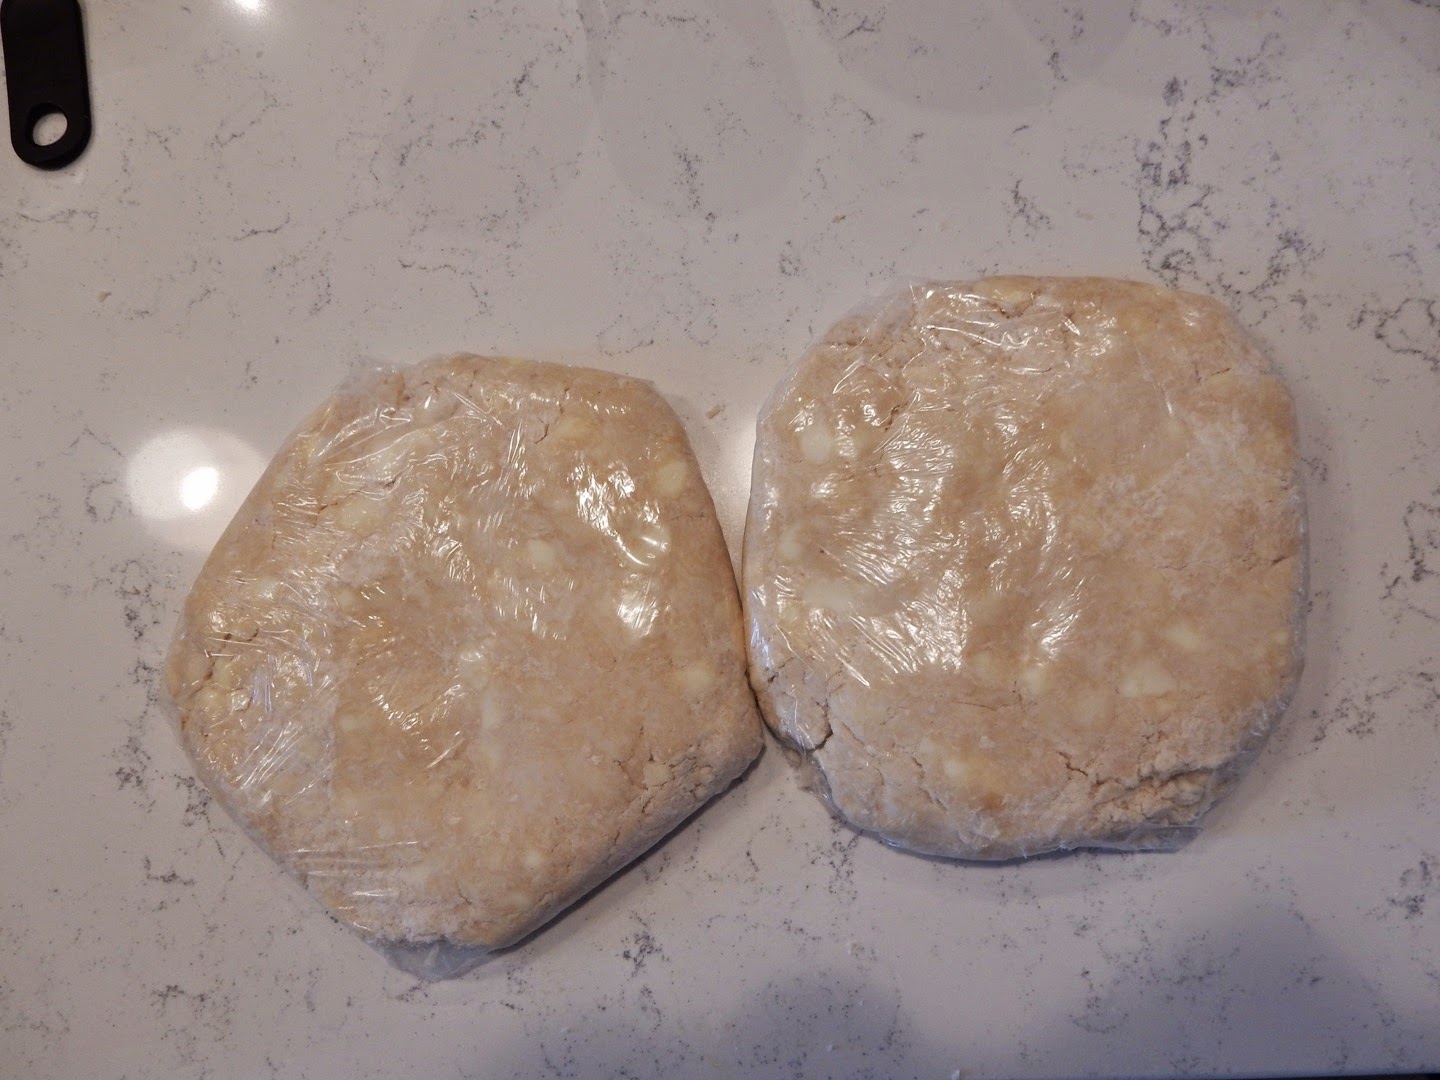
Ready to go in the fridge

Basic pie dough
Makes 2 crusts
Source: Everyday Food, November 2006

Ingredients
2 1/2 cups all-purpose flour (spooned and leveled)
1 teaspoon salt
1 teaspoon sugar
2 sticks (16 Tablespoons) cold unsalted butter, cut into pieces
1/4 to 1/2 cup ice water

Directions

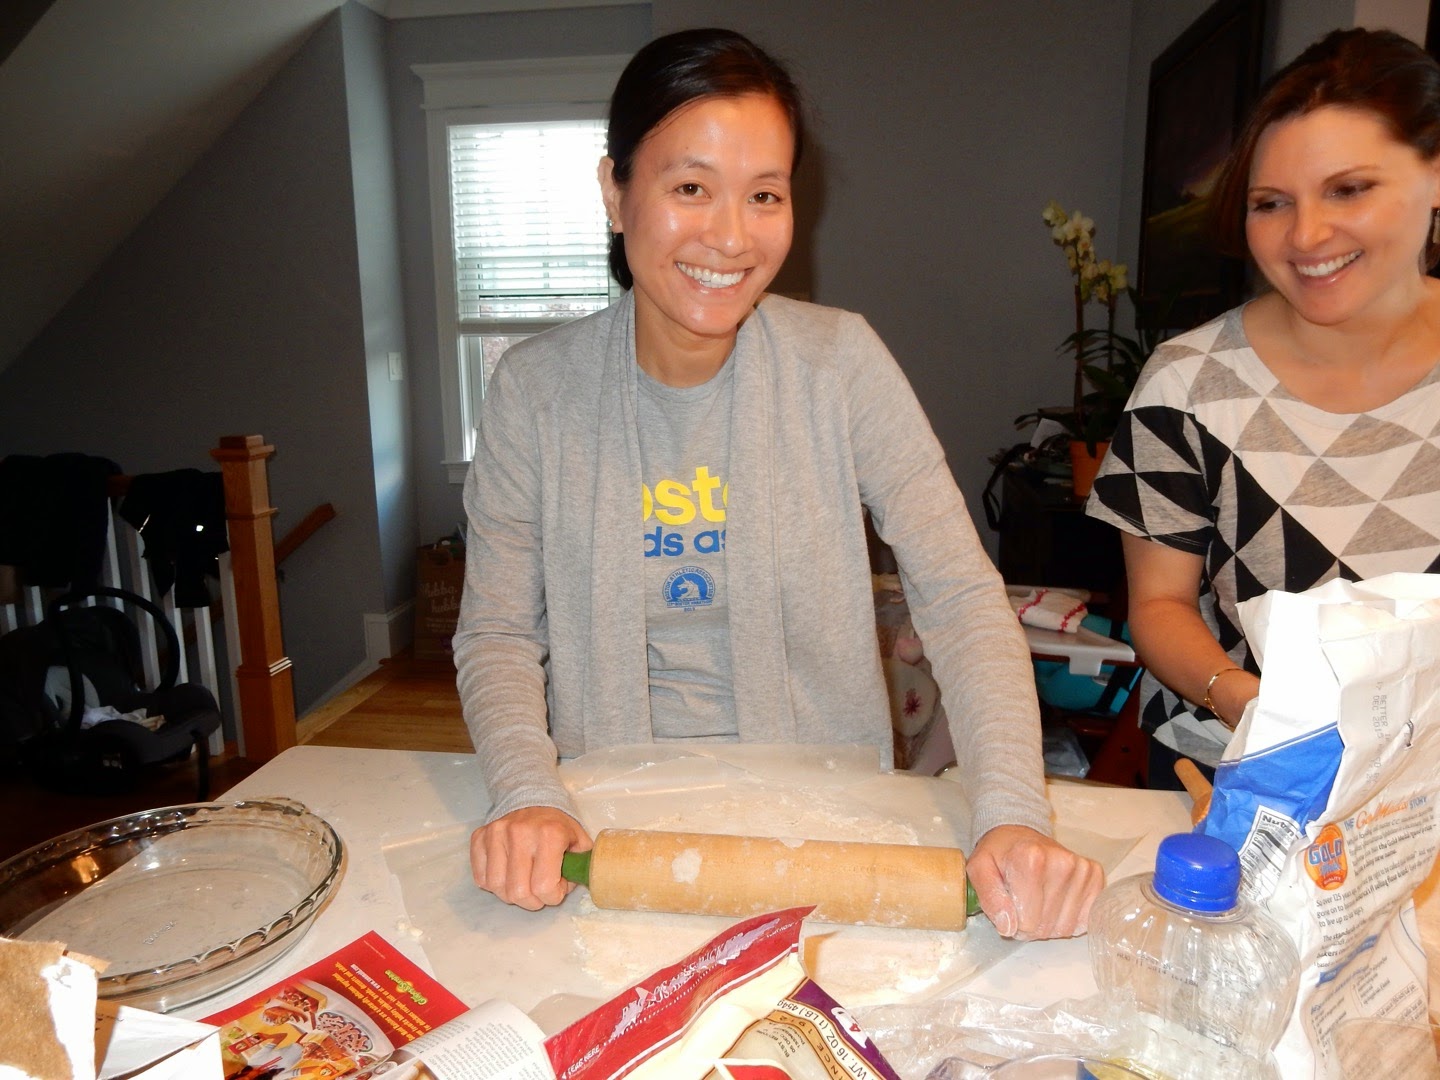
Rolling out the dough

1. In a food processor, combine flour, salt, and sugar; pulse to combine. Add butter; pulse until mixture resembles coarse meal, with just a few pea-size pieces of butter remaining.

2. Sprinkle with 1/4 cup ice water. Pulse until dough is crumbly but holds together when squeezed with fingers (if necessary, add up to 1/4 cup more water, 1 Tablespoon at a time). To help ensure a flaky crust, do not overprocess.

3. Transfer half of dough (still crumbly) onto a piece of plastic wrap. Form dough into a disk 3/4-inch thick; wrap tightly in plastic. Refrigerate until firm, at least 1 hours (and up to 3 days). Repeat with remaining dough. Disks can be frozen, tightly wrapped, up to 3 months. Thaw before using.

Apple pie
Serves: 8

This was 9 apples

Source: Everyday Food, November 2006

Ingredients
1/4 cup all-purpose flour (spooned and leveled)
1 recipe (2 disks) basic pie dough
2 Tablespoons fresh lemon juice (from 1 lemon)
4 pounds apples (8-10)
3/4 cup sugar
1 teaspoon ground cinnamon
1/2 teaspoon nutmeg
1/2 teaspoon salt
2 Tablespoons unsalted butter, cut into small pieces
1 egg, beaten
Sugar to sprinkle on top of pie (optional)

Directions

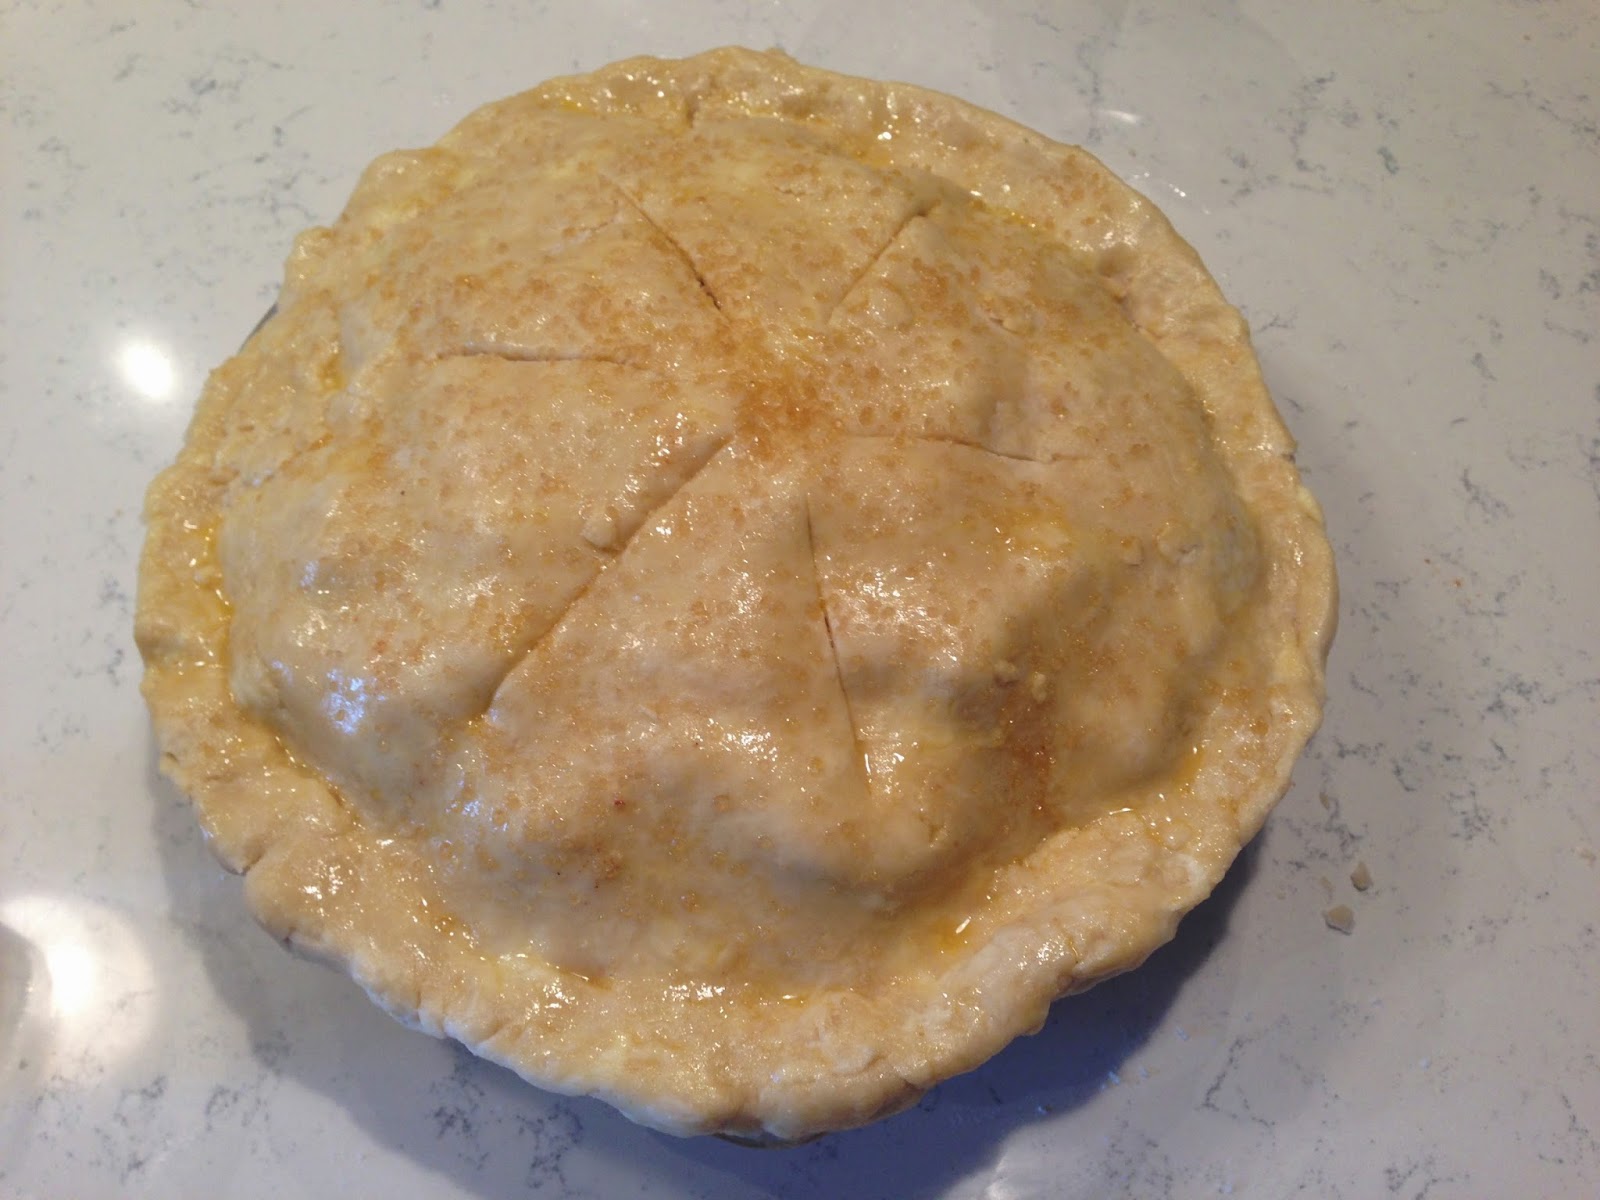
Ready to go in the oven, need to work on crimping skills

1. Lightly flour a large piece of waxed paper; place a disk of dough in center. Rolling from center outward, form into a 12-inch circle. (Use paper to rotate dough, and flour rolling pin and paper as necessary to prevent sticking). Transfer dough (still on paper) to a baking sheet; cover and refrigerate. Repeat with second disk of dough.
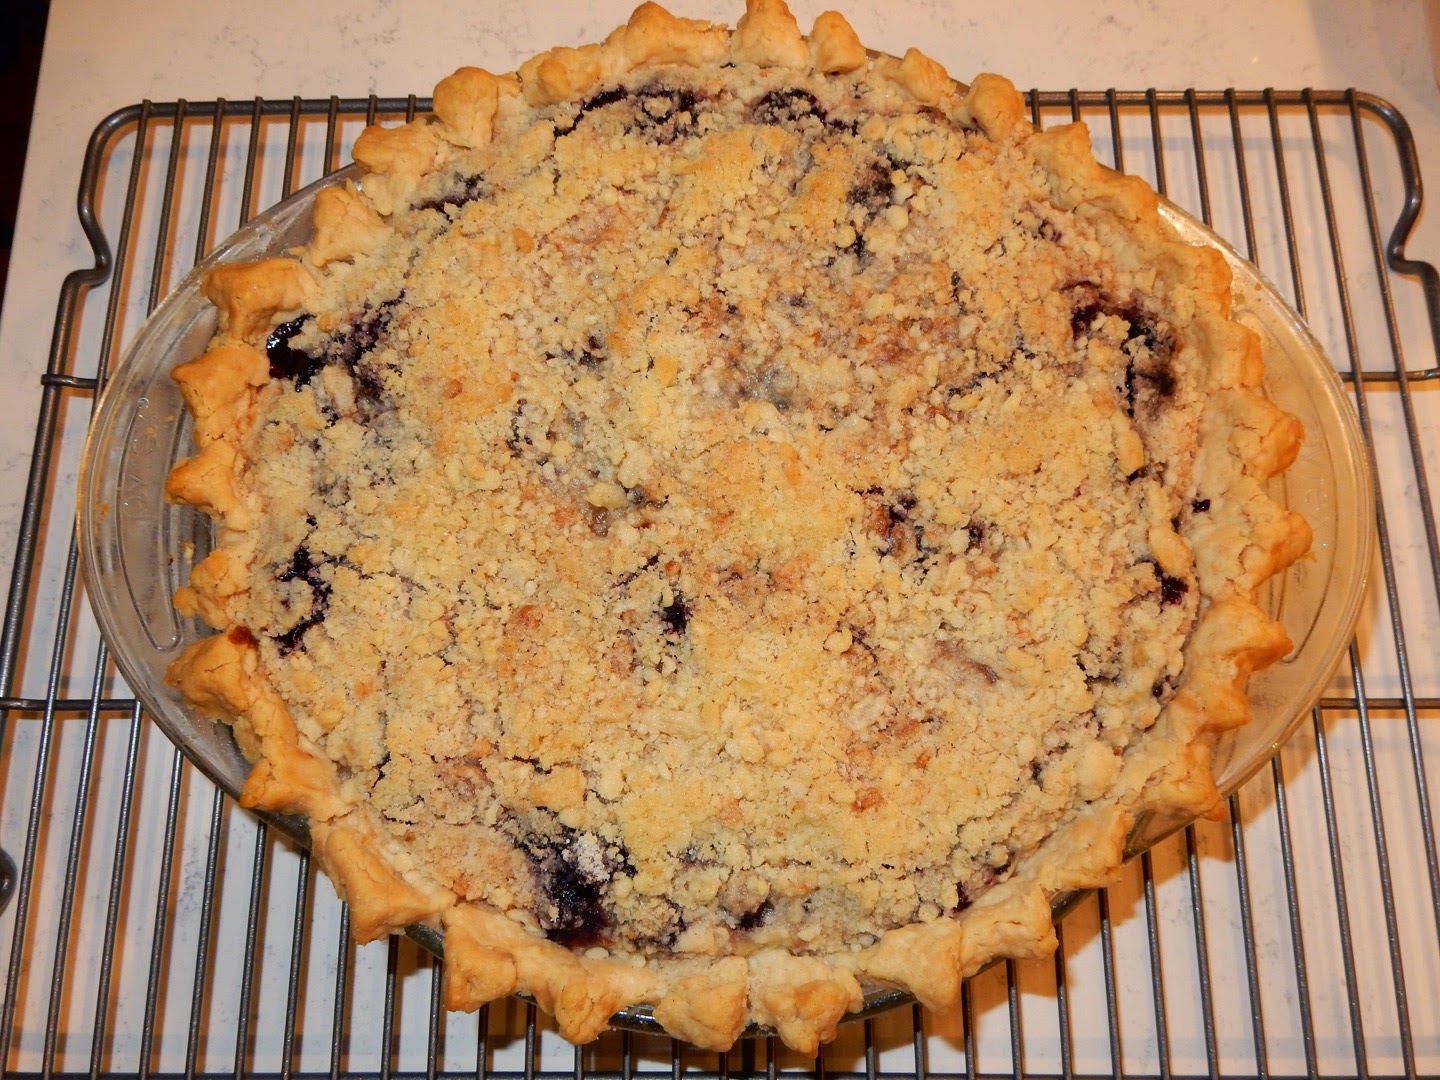
Voila!

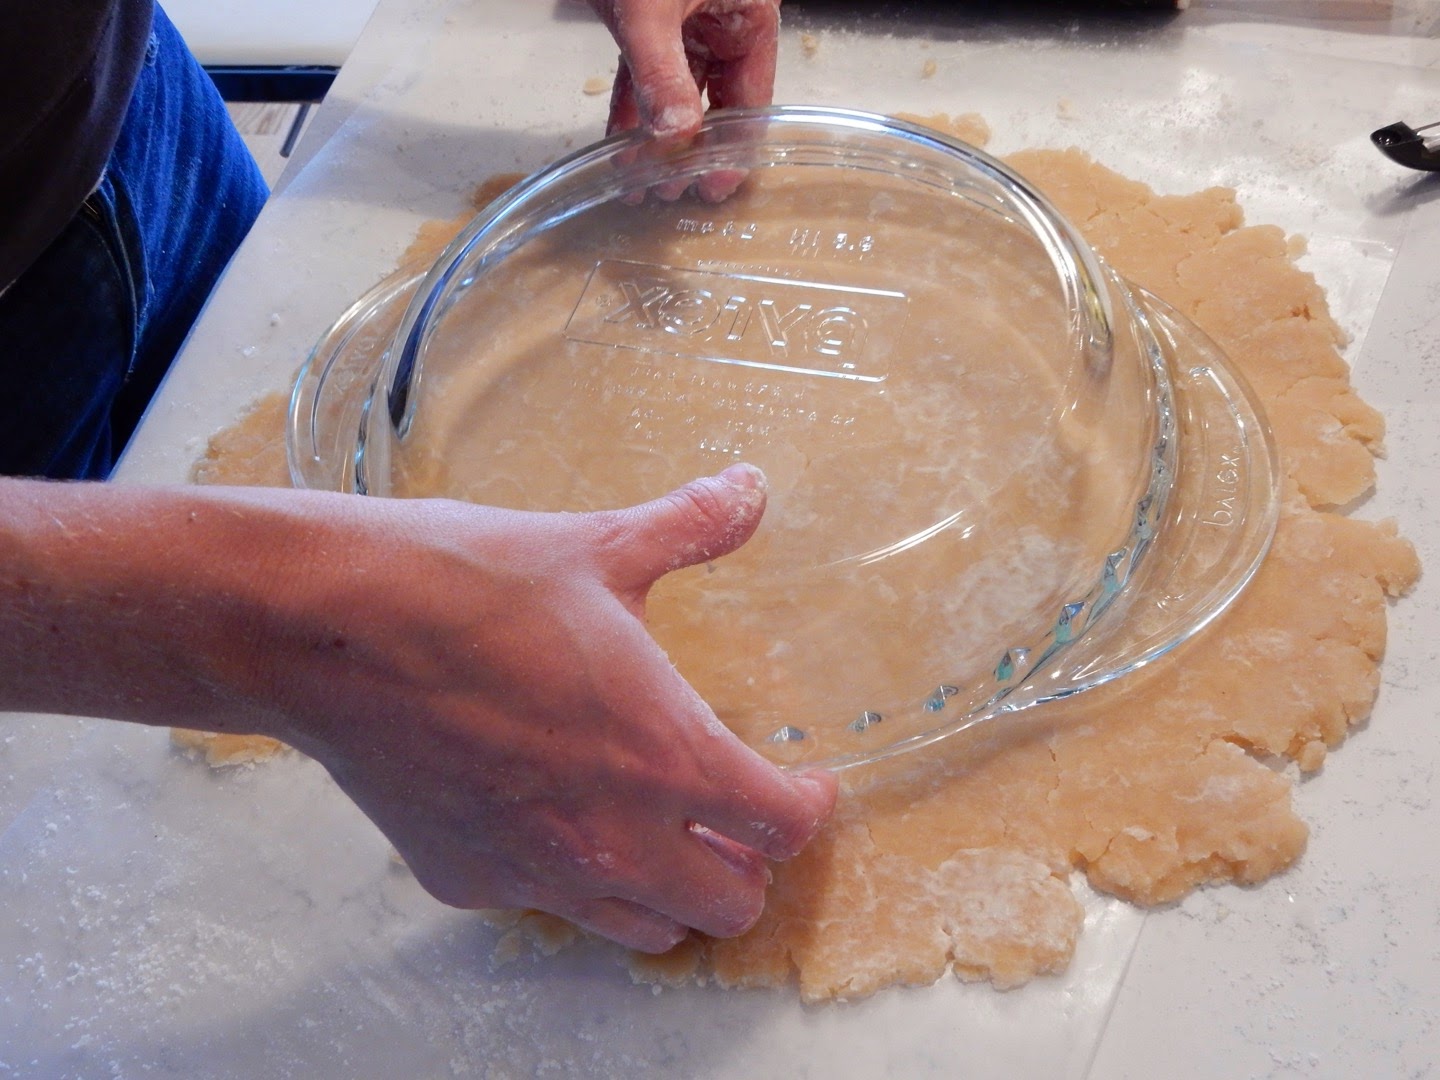
2. Preheat oven to 450 degrees F, with a rack set in lowest position. Remove first circle of dough from refrigerator; wrap around rolling pin (discarding paper), and carefully unroll over a 9-inch pie plate. Gently lift edges and lower dough into the pie plate so it hugs bottom and sides. Avoid stretching the dough, which will make it shrink during baking. Refrigerate.

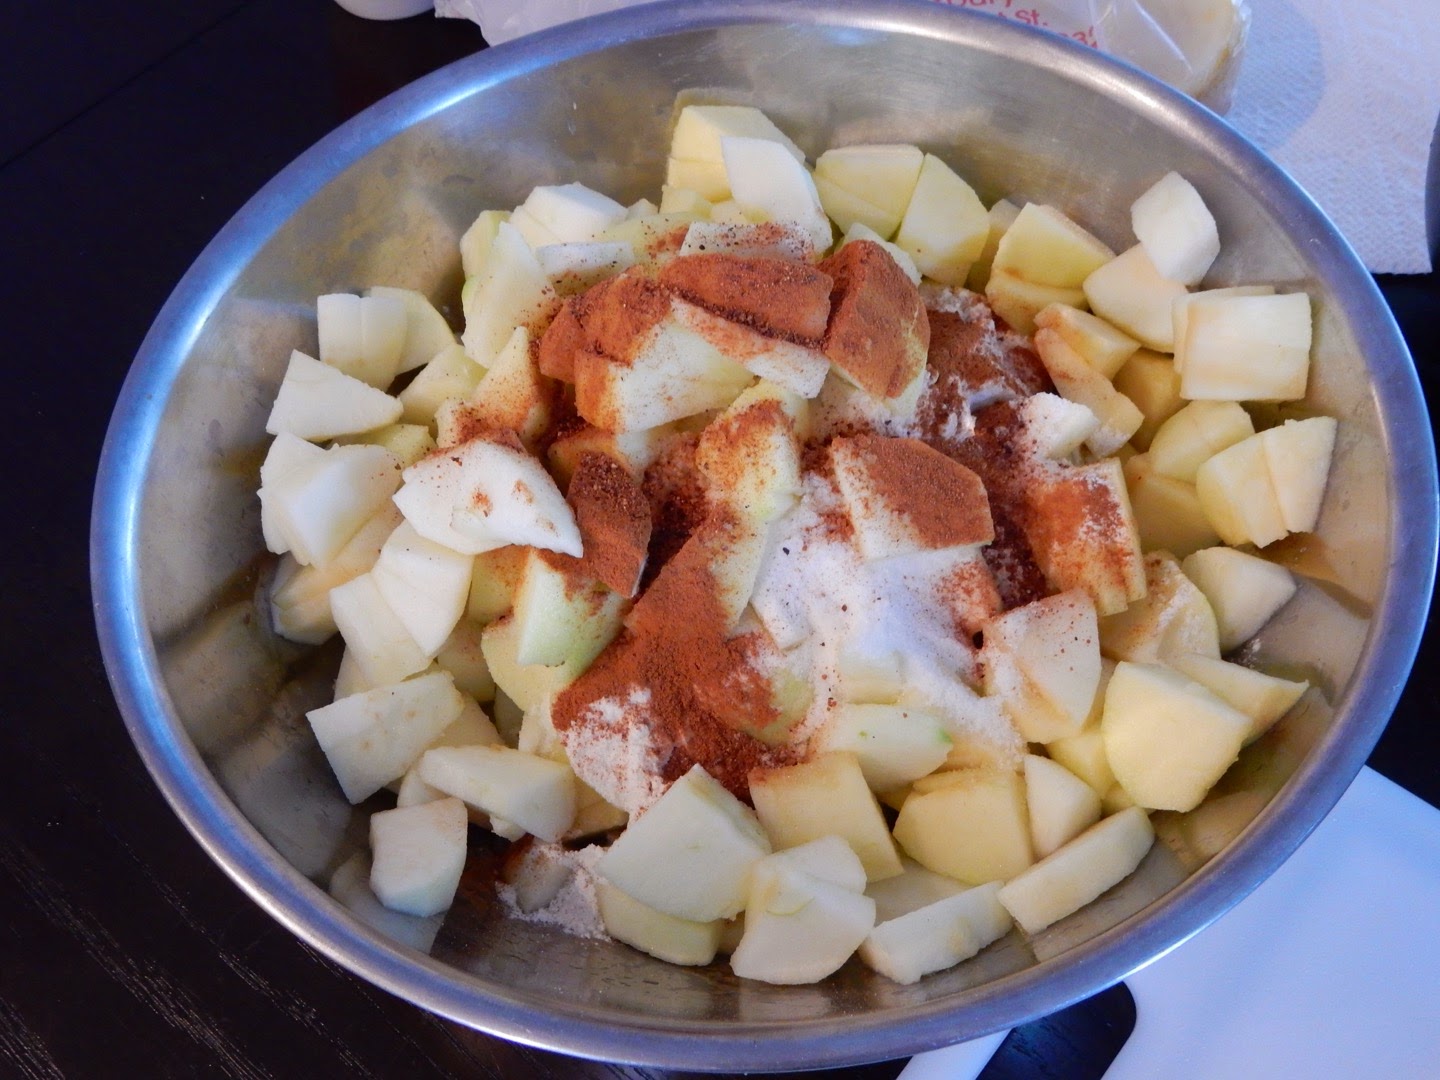
3. Place lemon juice in a large bowl. Peel, core, and cut apples into 1/4-inch thick slices; halve crosswise, and add to lemon juice (to keep them from turning brown) as you work. Add sugar, flour, cinnamon, nutmeg, and salt; toss to combine.

Delish!

4. Remove dough-lined pie plate from refrigerator. Fill with apple mixture, gently packing apples and mounding slightly in center; dot with butter. Lightly brush rim of pie shell with water. Remove remaining circle of dough from the refrigerator. Lay over apples; press along moistened rim to seal. Using kitchen shears, trim overhang to 1 inch.

5. With floured fingers, fold overhang under itself to form a thick rim; pinch between thumb and forefinger to form a uniform edge around the rim of the pie plate. To crimp edges: with thumb and index finger of one hand, gently press dough against knuckle of other hand; continue around the pie.

6. With a floured paring knife, cut 5-6 slits in top of pie, radiating from center. Brush top of crust with egg wash and sprinkle with sugar; place pie plate on a rimmed baking sheet. Bake 20 minutes; reduce heat to 375 degrees F and bake until crust is golden and juices are bubbling, 50-60 minutes more. If edges brown too quickly, cover with aluminum foild. Cool completely, at last 6 hours, before serving.

Butterfinger cookies

Chopping Butterfingers

I know it may seem like all I do lately is run and bake cookies. It’s not entirely untrue, but I will hopefully get back to some regularly scheduled programming (aka cooking) in the near future. I do have to come up with something interesting for an Olympics potluck this weekend…any ideas?

Folding in the chopped candy

Claire and I made these for the fundraiser that we planned for the UNC-Duke game that was not meant to be, in addition to Valentine M&M cookies and Nika cookies (oatmeal chocolate chip pecan). We made 1.5 times the recipe in order to have enough to fill all of the Valentine treat bags, but I decided to include the original recipe here…because math is hard.

I got to use Claire’s fancy new meat mallet to chop the Butterfingers. I might need to invest in one of those – it had more surface area for “chopping” than my hammer!


Butterfinger cookies
Source: Sally’s Baking Addition via Pinterest
Makes: about 3 dozen Kara-sized cookies

Ingredients
1 and 3/4 cups all-purpose flour

Delicious finished product!

3/4 teaspoon baking soda
1/4 teaspoon salt
3/4 cup granulated white sugar
1 stick unsalted butter, softened
1 large egg (use 2 if dough seems too dry)
8 fun size Butterfinger candy bars, chopped

Directions
1. Preheat oven to 375 degrees F.
2. Combine flour, baking soda, and salt in small bowl and set aside. In a medium or large bowl, mix together sugar and butter until creamy. Beat in egg until just combined.

3. Gradually beat in flour mixture. Fold in Butterfinger pieces. The dough will be very thick. Drop by slightly rounded teaspoonfuls onto ungreased baking sheet.

4. Bake for 10-12 minutes or until lightly browned. Cool and wire rack and enjoy! (I bet it will be hard to resist sneaking a warm cookie…)

Nika cookies

Apparently I like to bake during storms that occur in February and start with the letter “N”…last year Nemo, this year Nika, a slightly different version of a previous Oatmeal chocolate chip cookie recipe I’ve made. If you’re curious about the rest of this winter’s storm names, check out the list on the Weather Channel.

Nika (NEE-ka): From Greek mythology; the goddess who personified winning or victory.

View of the storm from my place

I was pretty excited that I actually cooked something…baking = cooking, right? It was a toss up between cookies and a red lentil soup recipe that I saw on Pinterest. Cookies won since I had all of the ingredients on hand (we definitely overbought for our post-Christmas cookie bake-a-thon as I still have two more pounds of butter in my freezer). Speaking of the Christmas cookiefest, these cookies were my almost favorite this year…M&M cookies will always be the favorite favorite. I think it was the substitution of the pecans for walnuts that gave them the silver medal over Martha’s sugar cookies and Sofra’s molasses cookies.

If you want to try these for yourself, I’ll be giving them away, in addition to Valentine M&M cookies, next week (2/12) at the UNC-Dook game watch event at the Baseball Tavern…in exchange for participating in a 50:50 fundraiser raffle to support my Boston Marathon fundraising efforts. I guess that’s what some people call bribing…you say potato, I say potato. Feel free to stop by, as long as you’re not rooting for the Dookies!

Oatmeal chocolate chip pecan cookies
Source: AllRecipes
Makes 6-7 dozen (depending on how big you like ’em)

This is how I chop pecans

Ingredients
1 cup unsalted butter (2 sticks), softened
1 cup packed light brown sugar
1/2 cup granulated white sugar
2 eggs
2 teaspoons vanilla extract
1 1/4 cups all-purpose flour
1/2 teaspoon baking soda
1 teaspoon salt
3 cups old-fashioned oats
1 cup chopped pecans
1 cup semi-sweet chocolate chips

Directions
1. Preheat the oven to 325 degrees F.

Just add milk

2. In a large bowl, cream together the butter, brown sugar, and white sugar until smooth. Beat in eggs one at a time, then stir in vanilla.

3. In a medium bowl, combine flour, baking soda, and salt; stir into the creamed mixture until just blended. Mix in the oats, pecans, and chocolate chips.

4. Drop by rounded spoonfuls onto ungreased cookie sheets (I line mine with parchment paper).

5. Bake 9-11 minutes or until light golden brown. Allow cookies to cool on baking sheet before transferring to a wire rack to cool completely.

Pumpkin chocolate chip bread

Pumpkin bread!

It was a perfect morning for baking, especially something pumpkin-y. I tried to use the baking attachment on my Ninja, but since the recipe made two loaves, the bowl of the food processor only had the capacity for the wet ingredients. It made quick work of mixing those up, and then I mixed the wet and dry ingredients the old-fashioned way.

I only have one loaf pan so I made one loaf of bread and 12 muffins. For the bread, it was hard to tell when it was done. The edges looked a little overdone while the middle was still undercooked. My oven tends to run a little hot, so I was checking on it periodically and ended up pulling out at just around 60 minutes. I really hope it’s not overcooked because I’m giving it as a birthday gift. 

On a side note, my place smelled amazing for hours!


Ninja, pre-mixing

Pumpkin chocolate bread
Source: adapted from My Baking Addiction
Makes: 2 loaves or 24 muffins

Ingredients
1 (15-ounce) can pumpkin puree
4 eggs
3/4 cup canola oil
3/4 cup water
1 Tbsp vanilla extract
2 cups sugar
3 1/2 cups all-purpose flour
2 tsp baking soda
1 1/2 tsp kosher salt
1 tsp cinnamon
1 tsp nutmeg
1 tsp allspice
1/2 tsp cloves
1 (12-ounce) bag semi-sweet chocolate chips

Directions

Ninja, post-mixing

1. Preheat oven to 350 degrees F. Grease and flour two 8.5 x 4 x 2.5 inch loaf pans or two 12-cup muffin pans.
2. In a large bowl, combine pumpkin, eggs, oil, water, vanilla, and sugar. Mix with electric mixer (or use stand mixer) until well blended.
3. In a medium bowl, whisk together flour, baking soda, salt, cinnamon, nutmeg, allspice, and cloves.
4. Slowly add the dry ingredients into the pumpkin mixture and stir until just blended. Fold in chocolate chips.
5. Pour batter into the prepared pans and bake for 60-70 minutes (bread) or 17-20 minutes (muffins) or until a toothpick inserted in the center comes out clean.

Carrot cupcakes with cream cheese icing

Well I managed to burn all of the cupcakes in this recipe. I’m going to call it a “fail” since I’ve used this recipe before without any problems. I’ll have to check my oven to see if it’s running hot. I had a plan to salvage them by slicing off the bottoms, but they looked so short and silly I could not convince myself that they deserved an appearance at Easter dinner.

I was fortunate to snag an invite to the Conforti-Lawson-Pugliano Easter dinner, and lucky for me they weren’t counting on my dessert. It was a good thing I had also picked up a couple of bottles of wine to bring. My Easter dinner included gnocchi with meatballs, chicken braciole, ham, ham pizza (like a quiche), kielbasa, green beans, and sweet potatoes. Then we had pineapple squares, ricotta cheesecake, red velvet cake, and pizzelles. What an amazing feast…thank you Mrs. Conforti!

Mixing in the carrots, walnuts, and coconut

Everything looked fine up to this point…

Carrot cupcakes with cream cheese icing
Source: Everyday Food
Makes: 12-14 cupcakes

Ingredients
1 cup granulated sugar
1/3 cup vegetable oil
2 Tbsp orange juice
1 tsp pure vanilla extract
2 large eggs
1 tsp baking powder
1/2 tsp baking soda
1/2 tsp ground allspice
1/2 tsp salt
3/4 cup plus 2 Tbsp all-purpose flour, spooned and leveled
1 1/2 cups shredded carrots
1/2 cup chopped walnuts
1/4 cup shredded coconut, plus more for garnish
8 ounces bar cream cheese, room temperature
3/4 cup confectioners’ sugar

Directions
1. Preheat oven to 350 degrees. Oil a standard 12-cup muffin tin or line with paper liners. In a bowl, combine sugar, vegetable oil, orange juice, 1/2 tsp vanilla extract, and eggs.
2. Stir in baking powder, baking soda, allspice, and salt. Add flour; mix. Stir in carrots, walnuts, and coconut.
3. Divide batter evenly among muffin cups (about 2 Tbsp batter per cup). Bake until toothpick inserted in centers comes out clean, 25 minutes. Let cool completely before frosting.
4. While cupcakes are baking, combine cream cheese, confectioners’ sugar, and remaining 1/2 tsp vanilla extract in a mixing bowl. Whisk until smooth.
5. Frost cupcakes, and garnish with shredded coconut.

Oatmeal chocolate chip cookies

4.5 pounds of chocolate chips…thanks Costco!

I have a confession, I could probably be fine without raisins in my life. But I do love oatmeal cookies, so we usually make oatmeal chocolate chip cookies. Another pretty delicious variation is to use butterscotch chips instead of chocolate chips. We’ve tried out a few different recipes over the years, and this year we used the recipe that was on the Quaker oatmeal box. This year I also discovered Denise’s obsession with Costco…six cups of oats did not really make a dent in her ten pound box of oatmeal!

Oatmeal chocolate chip cookies
Source: Quaker

Oatmeal chocolate chip goodness

Ingredients
1 3/4 sticks of butter (1/2 cup [1 stick] plus 6 Tbsp), softened
3/4 cup firmly packed brown sugar
1/2 cup granulated sugar
2 eggs
1 tsp vanilla
1 1/2 cups all-purpose flour
1 tsp baking soda
1 tsp ground cinnamon
1/2 tsp salt (optional) – Denise did the mixing so I’m not sure if we included the salt
3 cups oats
1 cup semi-sweet chocolate chips

Directions
1. Heat oven to 350 degrees F.

2. In a large bowl, beat butter and sugars on medium speed of electric mixer until creamy. Add eggs and vanilla; beat well.

3. In a medium bowl, combine flour, baking soda, cinnamon and salt. Add to butter-sugar mixture and mix well. Add oats and chocolate chips and mix well.

4. Drop dough by rounded spoonfuls onto ungreased cookie sheets.

5. Bake 8-10 minutes or until light golden brown. Cool 1 minute on cookie sheets; remove to wire rack and cool completely. Store tightly covered.

Molasses cookies

We started to make this recipe in 2009, and they’ve become a regular. The recipe is from Sofra Bakery & Cafe, when it was published in the Improper Bostonion (I think)…thank you Ana Sortun! Some of the directions were a little confusing as written, such as “chill dough until it reaches room temperature, about 2 hours”. Huh? We decided to chill the dough in the refrigerator…and let it chill while we worked on a different batch of cookies.

Delicious molasses cookies

Molasses cookies
Source: Sofra Bakery & Cafe
Makes: about 4 dozen

Ingredients
3/4 cup canola oil
1/4 cup molasses
1 cup sugar, plus additional sugar for cookies
1 large egg
2 cups flour
2 tsp baking soda
1/2 tsp salt
1 tsp ground cinnamon
1/2 tsp ground nutmeg
1/2 tsp ground cloves

Directions
1. Preheat oven to 350 degrees.
2. Combine flour, baking soda, salt, cinnamon, nutmeg, and cloves. Set aside.
3. Combine oil, molasses, sugar, and egg in bowl of a stand mixer. Paddle on medium speed until smooth. Be careful not to incorporate too much air. Mix 15-20 seconds (or vigorously by hand).
4. Add dry ingredients and mix until well-combined, about 20 seconds. Chill dough in refrigerator, about 2 hours. If preparing dough in advance, freeze it so the oil doesn’t separate.
5. Roll dough into about 1-inch balls and coat with sugar. Place on parchment-lined baking sheet and gently press cookie until slightly flattened. Bake 12-15 minutes. Cookes will appear underdone.

Double chocolate chip cookies with walnuts

We decided to bring this recipe back from 2006, except we updated it to include walnuts. Unfortunately a lot of these cookies broke when they got packed up, so I’m not sure I’d make them again…perhaps that’s the way the cookie crumbles when you play around with the recipe.

Mixing it up

Double chocolate chip cookies with walnuts
Source: Nestle

Ingredients
2 cups all-purpose flour
3/4 cup baking cocoa
1 tsp baking soda
1/2 tsp salt
2 sticks unsalted butter, softened
2/3 cup granulated sugar
2/3 cup packed brown sugar
1 tsp vanilla
2 large eggs
1 cup chocolate chips
~3/4 cup chopped walnuts

Directions
1. Preheat oven to 350 degrees F.
2. Combine flour, cocoa, baking soda and salt in medium bowl. Beat butter, granulated sugar, brown sugar, and vanilla in large mixing bowl until light and fluffy. Add eggs one at a time, beating well after each addition. Gradually beat in flour mixture.
3. Stir in chocolate chips and walnuts. Drop by rounded teaspoon onto baking sheets.
4. Bake for 9-11 minutes or until cookies are puffed and centers are set but still soft. Cool on baking sheets for 2 minutes; remove to wire racks to cool completely.

Finished product, before they all broke!

Sugar cookies

It is hard to pick favorites, but these might be a close second (M&M cookies will always be my first favorite). I love the hint of lemon and the sugar coating. We mixed in some green sugar with the sanding sugar to give them a bit of holiday flair.

Sugar cookie deliciousness

Old-fashioned sugar cookies
Makes about 3 dozen
Source: Adapted from Martha Stewart Cookies, 2008

Ingredients
3 cups all-purpose flour
1 tsp baking soda
1/4 tsp salt
1 3/4 cups granulated sugar
1/4 cup packed light brown sugar
1 Tbsp finely grated lemon zest
1 cup (2 sticks) unsalted butter, softened
2 large eggs
1 Tbsp fresh lemon juice
Sanding sugar

Directions
1. Preheat oven to 350 degrees F. Sift together flour, baking soda, and salt.
2. Put sugars and zest in the bowl of an electric mixer fitted with the paddle attachment. Mix on medium speed for 30 seconds. Add butter; mix until pale and fluffy, about 1 minute. Mix in eggs one at a time, and then the lemon juice. Reduce speed to low; gradually mix in flour mixture.
3. Roll cookies into balls, then coat with sanding sugar. Place on cookie sheets lined with parchment paper.
4. Bake cookies until golden, about 10-12 minutes. Transfer cookies to wire racks using a spatula; let cool completely. Cookies can be stored in airtight containers at room temperature up to 3 days.