Spaghetti squash with spinach and cheese

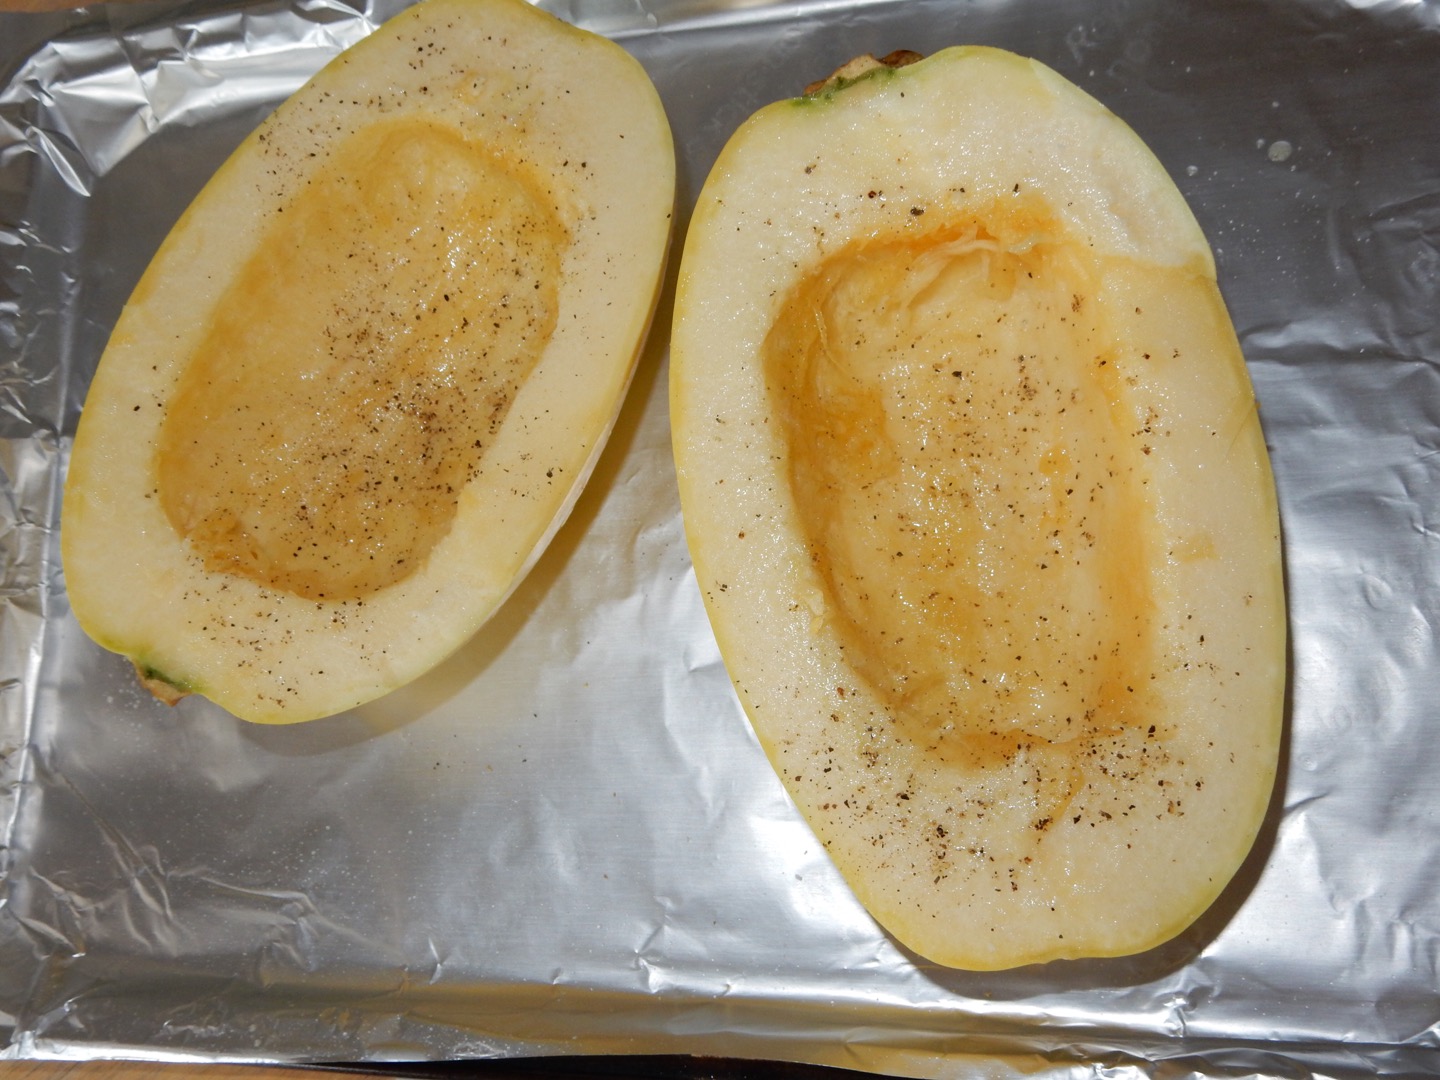
Getting ready to bake

I don’t yet have a “go to” spaghetti squash recipe, but this one might be in the running! I mean, who doesn’t love a warm and cheesy casserole? And for me, that cheese was an extra sharp cheddar…yum!

Spaghetti squash with spinach and cheese
Serves: 4-6
Source: adapted from Skinnytaste

Ingredients
1 spaghetti squash
1 clove garlic, minced

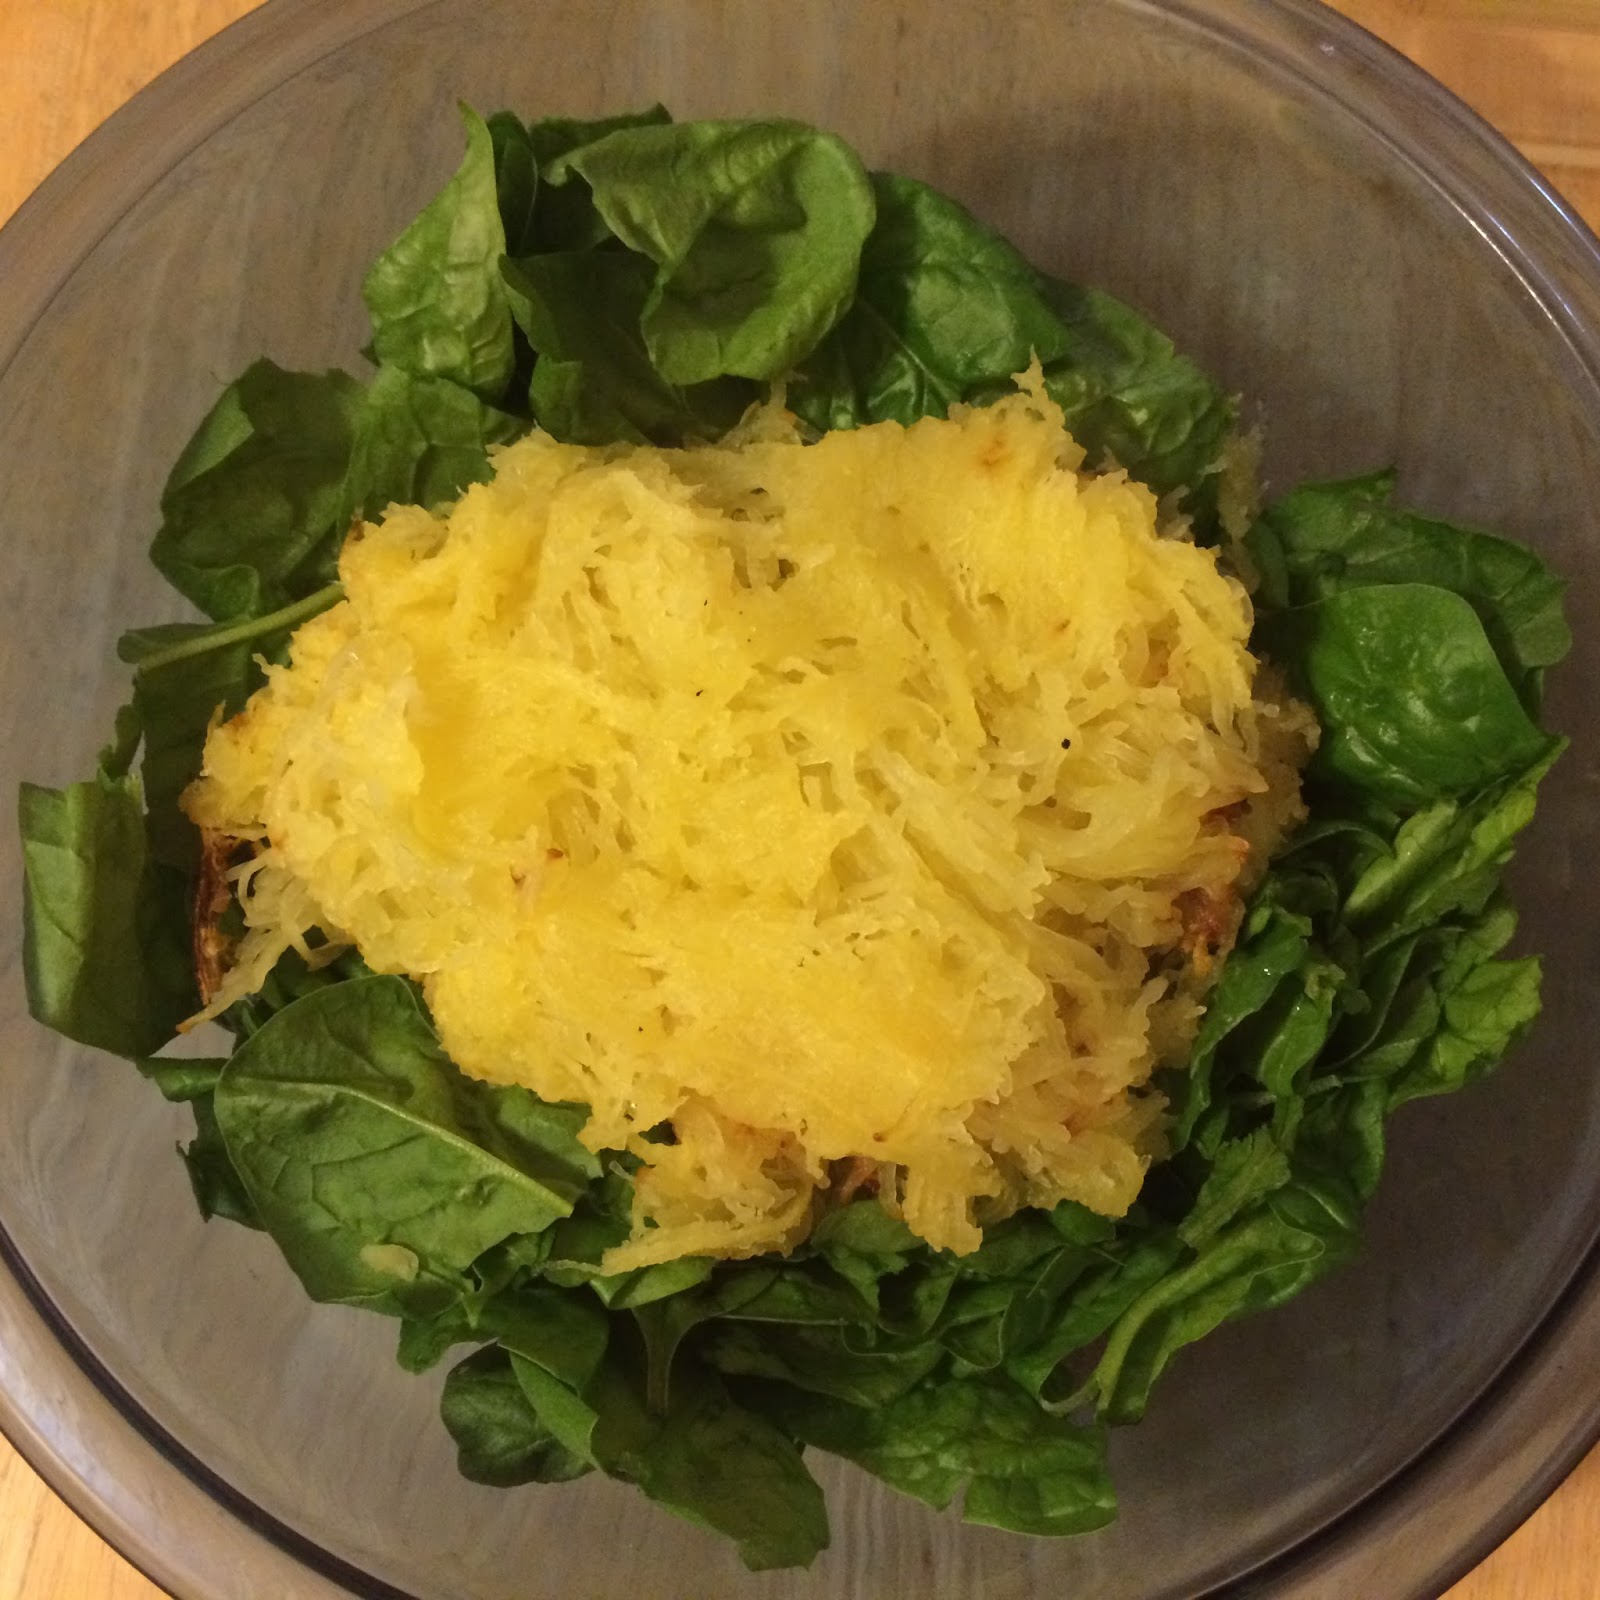
Spaghetti squash and spinach

1/2 medium onion, chopped
1 Tablespoon olive oil
2 Tablespoons flour (or 1 Tablespoon cornstarch if gluten-free)
1 cup lowfat milk
1/2 cup chicken or vegetable broth
1 cup shredded cheddar cheese
Salt and pepper, to taste
4 cups baby spinach
1 Tablespoon grated Parmesan cheese

Directions
1. Preheat the oven to 375 degrees F. Cut the squash in half lengthwise; remove seeds and discard. Place squash on a baking sheet lined with foil and bake until tender, about 1 hour. Remove from oven and when cool enough, separate the strands of squash with a fork and set aside. Keep the temperature on.

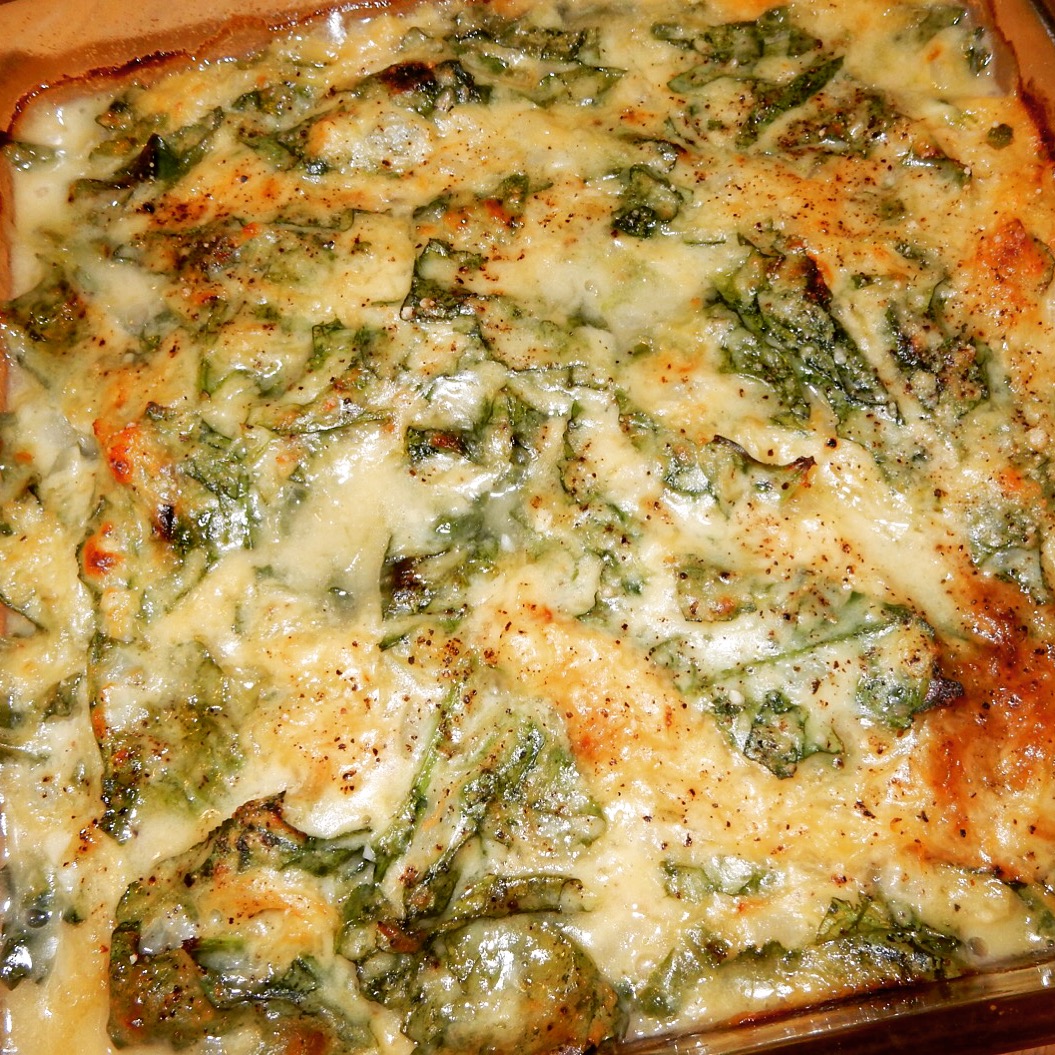
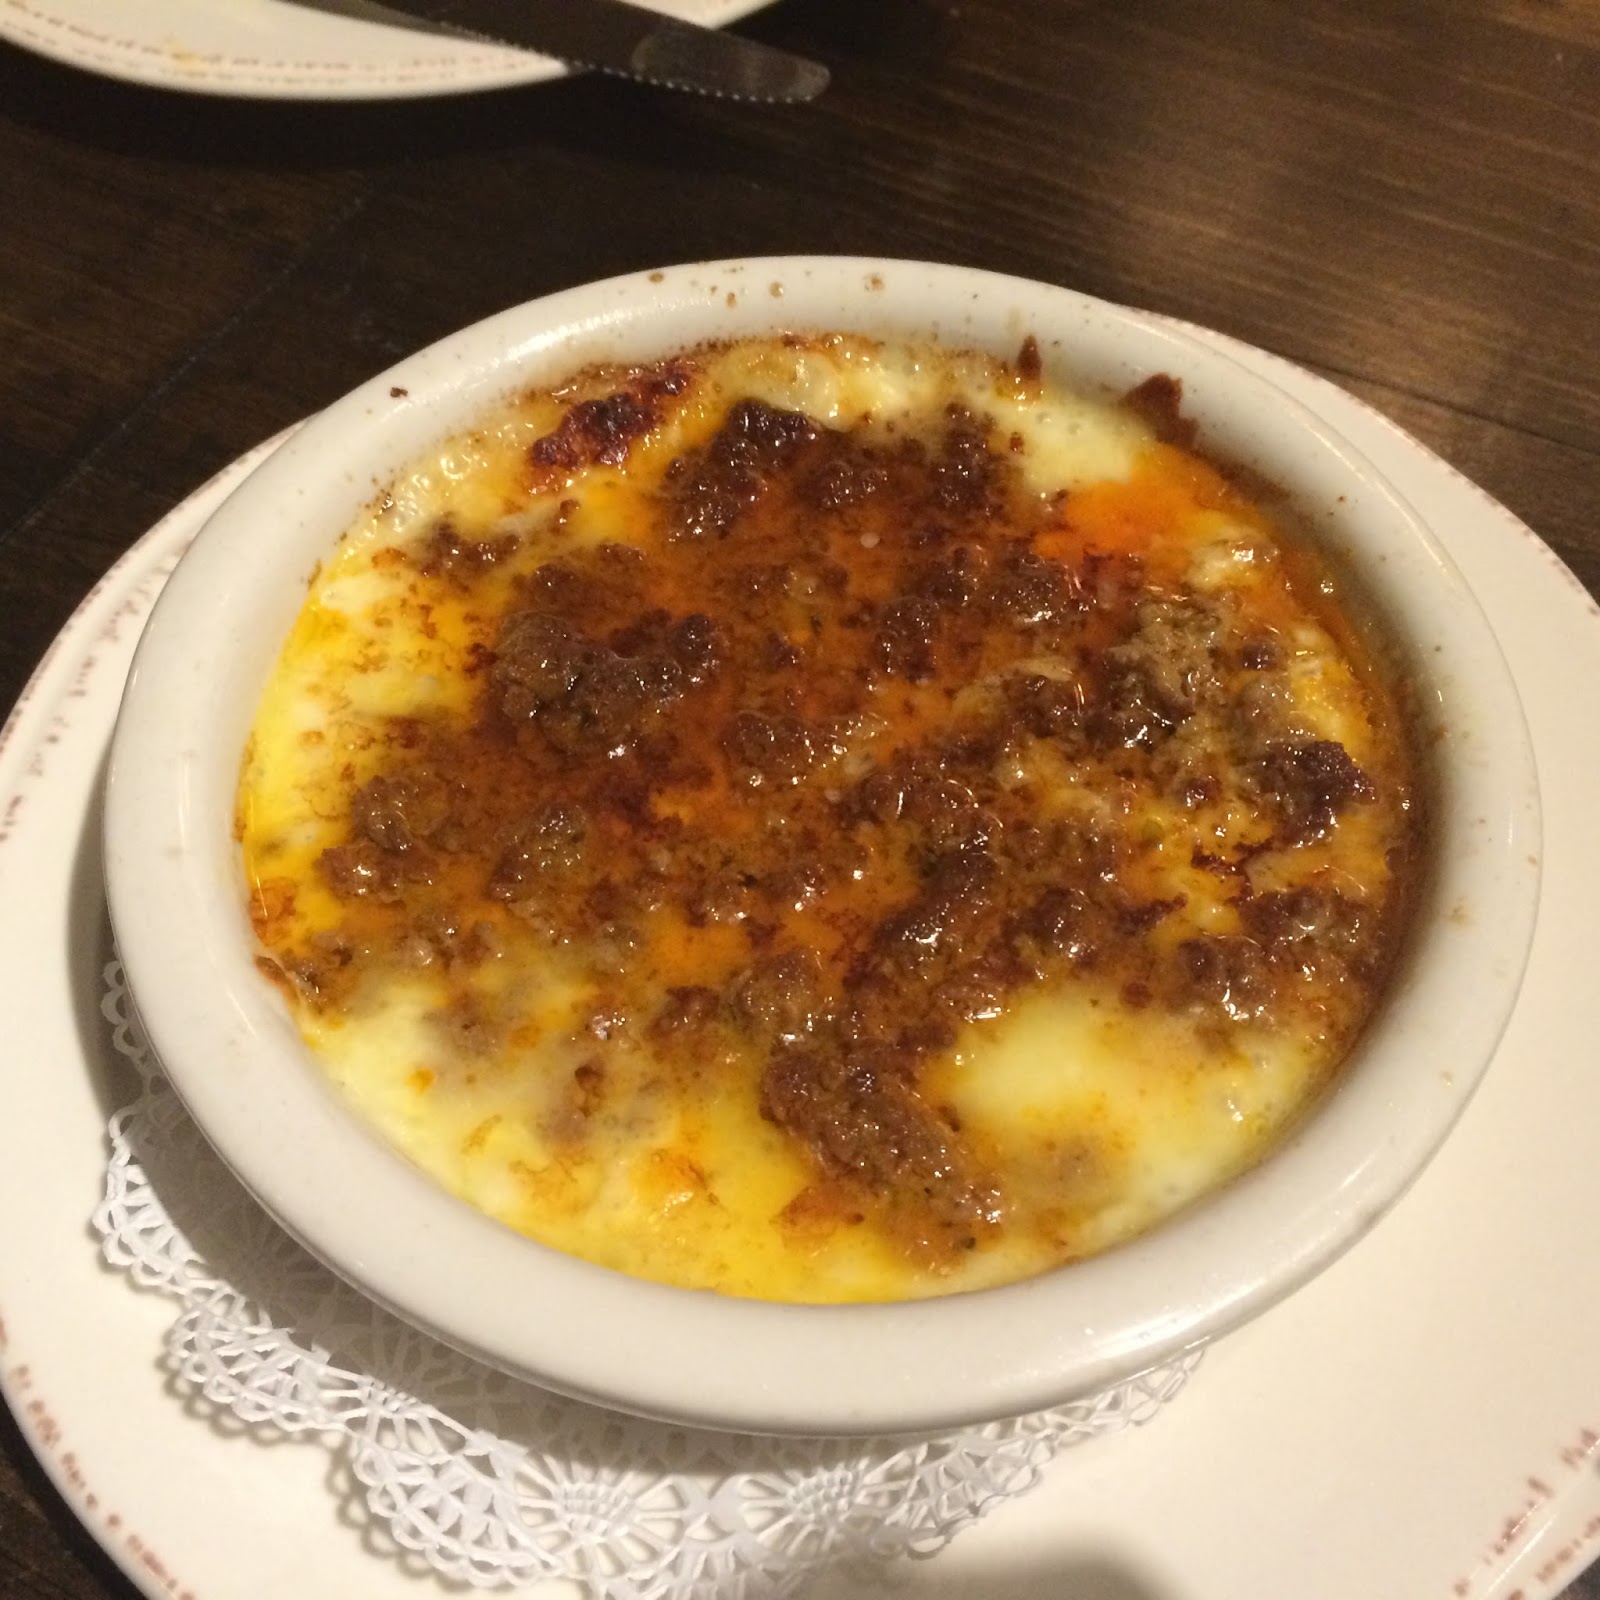
Warm and bubbly casserole


2. Heat oil in a large saucepan over medium heat. Add garlic and onions and cook about 2 minutes. Stir in flour. Reduce heat to low and cook, stirring continually 3-4 minutes. While whisking continuously, add milk and chicken broth and increase heat until the mixture comes to a boil and becomes smooth and thick, about 2 minutes. Season with salt and pepper.

3. Once it becomes thick, remove from heat, add cheddar cheese and mix until cheese is melted. Add cooked spaghetti squash and baby spinach and stir until combined. Pour into a baking dish and sprinkle Parmesan cheese on top. Bake for 25-30 minutes, until bubbly and golden.


September RC – Amuleto Mexican Table

Queso fundido
Ceviche del dia

This month we grabbed our passports and headed out of the city, to Moody Street in Waltham. Amuleto opened in August, in a space that has apparently housed several Mexican restaurants, most recently Habanero’s.

Unfortunately for me and my elaborate plans to get a ride there, I almost didn’t make it! It was one of those 95-degree days and apparently the MBTA feels like I do when it’s that hot…the trains were breaking down, delayed, and finally cancelled. I finally got on a train (with air conditioning, thank goodness for small blessings) at the time I was supposed to meet my ride in the city. One hour later, I arrived at North Station and decided to treat myself to an Uber. Unfortunately it was a rare #uberfail and my driver missed his exit and I got an extended tour, during rush hour. 

Needless to say, I was quite ready for a margarita when I finally made my appearance, almost an hour late. A first round of food had already been ordered, and I recall some delicious guacamole con Chicharrón (with serrano peppers and pork belly) and queso fundido (melted chihuahua cheese and chorizo).

We decided to order mostly from the botanas (snack, appetizer) section of the menu. The one platillo principal we got was the carne asada, and luckily Tracy was willing to share! It was pretty tasty. 

Grilled octopus

In no particular order, the botanas we got were:

  • Ceviche del dia, which was snapper
  • Pulpo Asado Chargrilled Octopus with caramelized onions, mushrooms, and chili pepper
  • Elote de la Calle Charred Corn with Cotija cheese and chile powder
  • Costillitas Baby Back ribs Rubbed with Agave Nectar with chipotle and lime glaze
  • Duo de Sopes (two homemade thick tortillas, one chicken and one barbacoa)
  • Carne asada
  • Tamal Sureño wrapped in a banana leaf

I remember enjoying everything I tried…which was the ceviche, the grilled octopus (thankfully not overcooked), the corn, and the ribs. I do not think I even had room for the duo de sopes or the tamale. And we were also too full for dessert (flan).

Great pick Claire!

The damage
$45 plus $28.80 for my Uber ride

The rundown
Amuleto Mexican Table
484 Moody Street, Waltham

Edamame hummus

Fresh edamame

Here’s a fun thing to do with edamame, whether it’s fresh from the farm or fresh from the freezer of your local grocery store. It’s a great snack that you can use however you would normally use hummus…I like it with Food Should Taste Good multigrain chips!

It is definitely easier to buy frozen edamame! If you buy it pre-cooked, all you need to is shell them. If it’s not cooked, then cook according to package directions.

Edamame, cooked and shelled

Since I got not one, but two bunches of fresh edamame, I went the fresh route this time. First, pick the pods off the branches, discarding any that are brown. I thought it might be a #loveuglyfood sitch so I cooked some of them anyway. But nope the beans inside were not the nice green color you want, so don’t bother with them. Some of the greenish-yellowish pods were still ok though.


Salt the pods generously and let sit for 15 minutes. I don’t know what the purpose of this is, and I don’t remember doing this in the past, but that was part of the instructions I used from who knows where. Then boil in salted water for about 6 minutes, drain, and pop out of their shells.

Be patient with your food processor – it definitely took longer than I expected to get it to the right consistency.


Edamame hummus
Makes: a lot!

Hummus and chips


Ingredients

1 1/2 cups shelled edamame, cooked

Juice from 1 lemon (about 2 Tablespoons)
3 Tablespoons tahini
2 garlic cloves, peeled
6 Tablespoons water (more if needed for consistency)
1/2 teaspoon kosher salt
1/4 teaspoon black pepper

Directions

1. Add the ingredients to a blender or food processor and puree until smooth. Enjoy!

Chicken Marengo

I have made this recipe twice and both times have failed to successfully capture a “finished” photo…perhaps the third time will be the charm, but in the meantime I decided to share this with you anyway. Wikipedia tells me that chicken Marengo is a French dish, originally named to celebrate Napoleon’s win in the Battle of Marengo. It also tells me that it is supposed to be garnished with fried eggs and crayfish but that these are often omitted. I think this is similar to Julia Child’s “Napoleon’s Chicken.”

Cutting up the raw boneless chicken thighs was not a whole lot of fun, but if you can make it past that part, then this recipe is pretty tasty. 

It is important to cook the pieces of chicken in a single layer to get them to brown properly. If you have to cook it in two batches (as I did), I would recommend using 1 Tablespoon of oil at a time and wiping out the bottom of the pot in between batches. Otherwise, the yummy brown bits that become part of the sauce when you deglaze the pan will become not so yummy burnt black bits. I speak from experience…

The first time I had this with pasta, and then I made it with polenta. Pasta was much easier for me than polenta, but that might be because I managed to burn myself as I was whisking in the cornmeal. I also thought it was kinda bland.

Chicken Marengo

Browned chicken thighs

Source: Crunchy Creamy Sweet
Serves: 4

Ingredients
4 boneless, skinless chicken thighs, cut into 2″ pieces
1/4 cup all-purpose flour
1/4 teaspoon salt
1/4 teaspoon ground pepper
2 Tablespoons olive oil
1/2 large yellow onion, chopped
2 garlic cloves, minced
1/2 cup white wine
1 can (14 ounces) diced tomatoes
1 cup chicken broth
1 teaspoon Italian seasoning
1/4 teaspoon red pepper flakes
1/2 cup sliced black olives

Directions
1. In a large ziploc bag, toss the chicken in the flour, salt, and pepper.

2. In a large pot or Dutch oven, heat the oil on medium. Cook the chicken in a single layer until browned, 3-4 minutes per side. Remove from pot and set aside on a plate.

3. Add more oil to the pot if needed. Add onion and cook for 2-3 minutes, until it is softened. Add garlic and cook for 30 seconds.

4. Add wine and deglaze the pan (scraping up all those yummy brown, not black, bits). Add tomatoes, chicken broth, Italian seasoning, red pepper flakes, and olives. Bring to a boil.

5. Add chicken back to the pot. Reduce heat to low and simmer for 20-25 minutes, or until the chicken is cooked through and the sauce has thickened.

Zucchini muffins

One zucchini per week feels pretty manageable, especially when it’s a ‘normal’-sized one and not a super-sized one. I decided to prep breakfast for the week with these tasty zucchini muffins. And this recipe made a perfect little six pack of muffins. 

The batter will feel really dry and lumpy after adding the egg and oil in step three. Don’t panic! The liquid from the zucchini will make it more batter-like…I promise. And bonus, you don’t have to do creative things to squeeze the liquid out of the shredded zucchini, a step that is often included. I am all about the short cuts!

Also, I accidentally doubled the baking powder, which did not have an adverse effect..probably because it was such a small amount to begin with. But according to this article, too much baking powder can cause baked goods to rise too high (then collapse) and taste metallic. GTK (good to know).

Muffins!


Zucchini pecan muffins
Makes: 6-7 muffins
Source: adapted from Taste of Home

Ingredients
3/4 cup all-purpose flour
1/2 cup sugar
1/4 teaspoon baking powder
1/4 teaspoon baking soda
1/4 teaspoon salt
1/4 teaspoon ground cinnamon
1 egg
1/4 cup canola oil
1 cup shredded zucchini
1/2 cup chopped pecans
1/4 cup mini semisweet chocolate chips

Directions
1. Preheat oven to 350 degrees F. Line a muffin tin with paper liners or spray with cooking spray.

2. In a medium bowl, combine the flour, sugar, baking powder, baking soda, salt, and ground cinnamon.

3. In a separate bowl, combine the egg and oil; stir into dry ingredients just until moistened (it will feel dry and lumpy). Stir in the zucchini just until combined. Fold in the pecans and chocolate chips. 

4. Spoon the batter into the muffin cups until about three-quarters full. Bake for 22-25 minutes or until a toothpick inserted in the center comes out clean. Cool for 5 minutes before removing from pan, then cool completely on a wire rack. Enjoy! 

August RC – Pikalo Empanadas & Sandwich Bar

Empanada menu, photo credit: Jerel Calzo

This month was an RC first…takeout! It was a very fun (and cheap!) first, and Jerel, Michael, Cora, and Jude were wonderful hosts. We are waiting for an invitation to the opening of the “Family Restaurant.”

Jerel’s pick was Pikalo Empanadas & Sandwich Bar, a place that recently opened on Centre Street in Jamaica Plain. An empanada is a stuffed bread or pastry that is baked or fried. 

There was such a large selection, it was hard to pick, but we managed to narrow it down to eight (yes eight) kinds to try:

  • Shredded beef (Ropa Vieja)
  • Codfish (Bacalao)
  • Corn and cheese
  • Conch (Lambi)
  • Lobster (Langosta)
  • Shrimp and cheese (Camarones and Queso)
  • The Beatles (mushroom, spinach, cheese, onion)
  • The spread
  • Crabmeat (Cangrejo) 

My favorites were the shredded beef, the corn and cheese, and the Beatles (mushroom, spinach, cheese, onion). Fried, stuffed doughy goodness. Yum. Since we cut each empanada in half or quarters (kitchen scissors were super handy for this!), the one “complaint” was that sometimes the filling was a little uneven (and sometimes we wished there was just more filling).

For dessert we had dulce de leche cookies (fro Pikalo’s) and cider donuts from the new Boston Public Market. And then I needed a nap. Great pick Jerel!

The damage
$16 per person (we are so frugal!)

The rundown
Pikalo Empanadas & Sandwich Bar (web site coming soon, so they say)
378 Centre Street, Jamaica Plain

Zucchini pie

So. Much. Zucchini.

Kara 1, zucchini 0! I am conquering the zucchini and summer squash this season. Well, it helps that the season is winding down…I can handle one per week. I made this recipe awhile ago and it was a great way to use both zucchini and corn. I liked this recipe a lot and it froze well. 

I decreased the butter, salt, and cheese that was in the original recipe. They are all things I like, but thought it would be just as tasty with a little less.

Zucchini pie
Serves: 4-6
Mixin’ in the corn, mushrooms, and basil
Voila!

Adapted from Pinch of Yum


Ingredients
2 Tablespoons butter
1 yellow onion, diced
1 clove garlic, minced
2 large zucchini, sliced thin
6 ounces sliced mushrooms
1 cup frozen corn (or 2 ears sweet corn)
1/4 cup chopped fresh basil
1 teaspoon dried oregano
1/4 teaspoon salt
1/4 teaspoon black pepper
1 1/2 cups shredded cheese, plus more to sprinkle on top
3 eggs, beaten

Directions

1. Preheat the oven to 375 degrees F. Heat butter in a large, deep skillet over medium high heat. Add the onions, garlic, zucchini, and mushrooms. and saute until the veggies are soft, 5-10 minutes. Remove from heat. 

2. Stir in the corn, basil, oregano, salt, and pepper. Add the cheese and the beaten eggs. Line a 9-inch pie pan with parchment paper (or grease pan with nonstick spray). Transfer the mixture to the pan. Sprinkle with a little more cheese, cover with nonstick foil and bake for 20 minutes. Remove foil and bake for an additional 5 minutes to brown the top. Let stand for 10-15 minutes before slicing and enjoy!

CSA Week 11

Two point five pounds (my half) of tomatoes last week? No problem! They were delicious on tomato sandwiches, BLTs, and in salads. Almost two more pounds this week? Bring it on.

Even without lettuce, they still make a great salad! I’ve been loving the combination of tomato, green pepper, banana pepper, red onion, and feta with my go-to salad dressing (super easy recipe below). So simple, yet so freaking good.

It was nice to see corn again this week too, and two melons (one with the vegetable share and one with the fruit share). Lucky for me, I got another yellow one!

Week 11


I donated two of the eggplants to one (or two) lucky person(s) in my office. I saved one for myself and still need to figure out what to do with it, and soon, as they don’t always last as long as some other types of veggies. The onions seem to be accumulating, but they will last for awhile. I also need to figure out what to do with a zucchini (from last week) and now a summer squash. I did find a zucchini muffin recipe that I want to try, but this week it’s been too hot to even think about turning on the oven. 

Balsamic vinaigrette
1 part olive oil
1 part Dijon mustard
1 part balsamic vinegar
Salt and fresh ground pepper to taste

Have a great week…stay cool!

CSA Week 10

After a two-week break from CSA and a Euro-Vegas vacation, I am back…and ready to welcome veggies back into my diet. Apparently Belgians do not like vegetables so much. I guess it could be hard to pick veggies over delicious beer, chocolate, and waffles! Vacation was lots of fun and it was great to celebrate some fabulous occasions, even if it did lead to a very strange itinerary and a *lot* of time on planes. Congrats to the newlyweds, Laurens and Matthias, and happy birthday to Paetra!

Week 10

It looks like I came back right in the thick of tomato season…five pounds this week! I can’t believe I bought some tomatoes at the store last weekend. Tomato sandwiches have definitely been happening. And I’m hoping to attempt a tomato tart with phyllo dough. Wish me luck!


Whenever I get a watermelon, I always cross my fingers that it’s yellow. And this week I was in luck! And that made me wonder if there is a way to tell…which led me to Google. While I did not find anything telling me a way to differentiate a yellow from a pink watermelon from the outside, I did learn that yellow watermelon is known as “Yellow Crimson” and the more popular pink watermelon is called “Crimson Sweet.” Remind me again, what did we do without Google? And speaking of Google, did you hear about their restructuring as Alphabet?

Shrimp tacos with kohlrabi slaw

Since I’m pretty much always in the mood for tacos, I used this as an excuse to find a creative way to use my kohlrabi. Kohlrabi is in the cabbage family so I thought it would make a perfect slaw for some seafood tacos. For me, pickled cabbage is a very important component of fish tacos.

I made the slaw, crema, and taco seasoning ahead of time, which made the shrimp cooking and dinner prep pretty quick and easy. And the results definitely satisfied my taco craving!

Shrimp tacos with kohlrabi slaw and lime crema
Serves: 4

Shrimp prep


Ingredients
For the kohlrabi slaw
2 bulbs kohlrabi, peeled and shredded (about 2 1/2 cups)

2 Tablespoons distilled white vinegar
1 teaspoon sugar
1/2 teaspoon salt

For the lime crema
1/4 cup sour cream
1 Tablespoon fresh lime juice

For the shrimp
1 pound shrimp, peeled, deveined, and with tails removed
1 Tablespoon canola oil, divided
1 Tablespoon fresh lime juice
1 Tablespoon taco seasoning

Shrimp tacos

1 garlic scape or 1 clove garlic, minced
1/2 jalapeno pepper, finely chopped


Corn tortillas
Avocado, sliced

Directions
1. In a medium bowl, mix together the ingredients for the kohlrabi slaw and set aside. 

2. In a small bowl, mix together the ingredients for the lime crema and set aside.

3. In a large bowl, mix together the shrimp, taco seasoning, 1/2 Tablespoon canola oil, and lime juice. In a large saucepan, heat the other 1/2 Tablespoon canola oil over medium heat. Add garlic and jalepeno and cook, stirring frequently 2-3 minutes, until softened. Add shrimp and cook until they are pink and opaque, 4-5 minutes.

4. Warm tortillas. To each tortilla, layer shrimp, kohlrabi slaw, sliced avocado, and drizzle with lime crema. Enjoy!